How to configure your Windows PC to use the secure DNS service? (For home users only)
Release Date: 10 Jul 2018
8020 Views
[Updated on 17 Feb 2022] Added procedures for Windows 11
Many security incidents are used to lure user to access the malicious site via a phishing URL or malware background execution. To avoid and protect your personal computer, you could configure your DNS service as follow:
Prerequisite
Local admin right is required in order to go through the following steps.
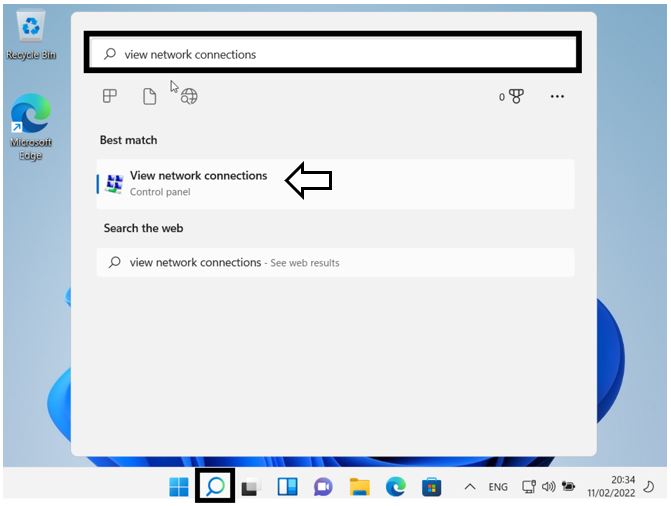
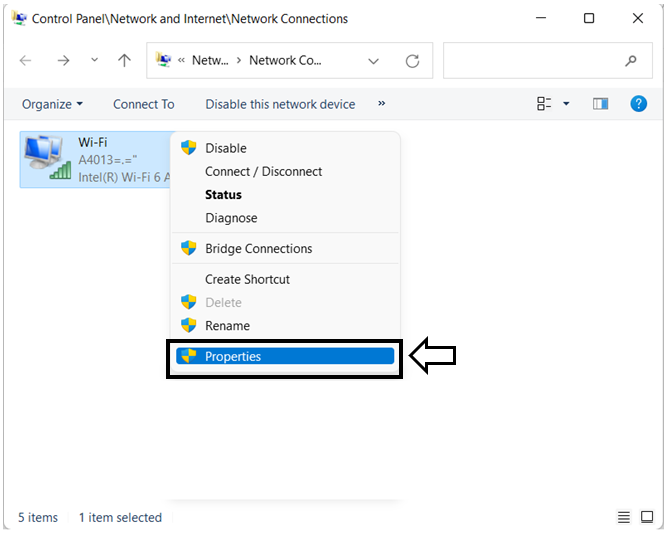
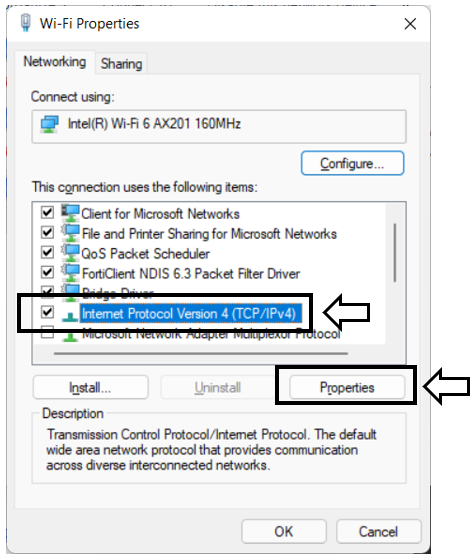
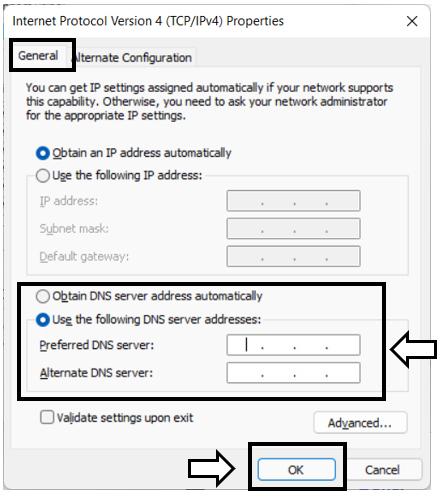
Window 11
- Click “Search Icon” at the menu bar and input “view network connections” in search bar. Click the search result
- Depends on the connection type, right click the active connection icon (e.g. “Ethernet” for wired connection or “Wi-Fi” for wireless connection) and select “Properties”
- Highlight “Internet Protocol Version 4 (TCP/IPv4)”, and click “Properties”
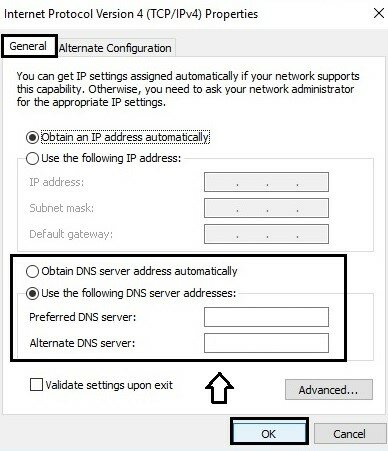
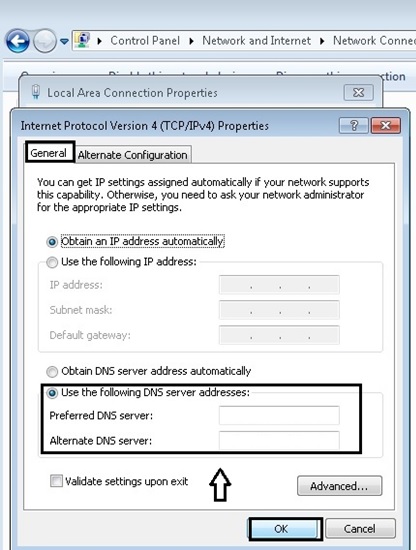
- Under “General” tab, select “Use the following DNS server addresses:”. Enter the IP of DNS to “Preferred DNS server: “and “Alternate DNS server:”. If you have done the configuration, click “OK” to confirm”
- Done.
Window 10
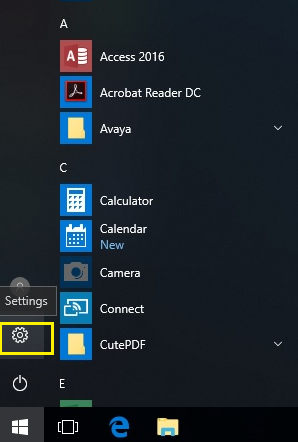
- From the “start menu”, click “Settings”.
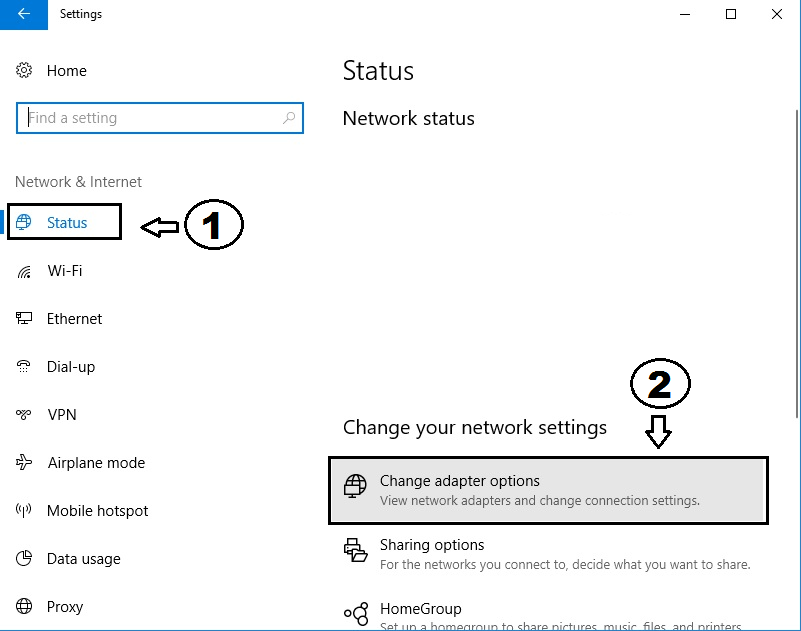
- Select “Network & Internet”

- Select “Change adapter options” (Tips: make sure “Status” tab is selected)
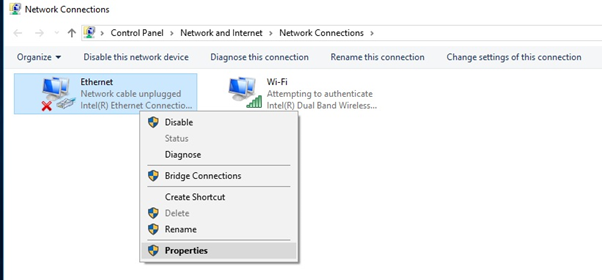
- Depends on the connection type, right click the active connection icon (e.g. “Ethernet” for wired connection or “Wi-Fi” for wireless connection) and select “Properties”
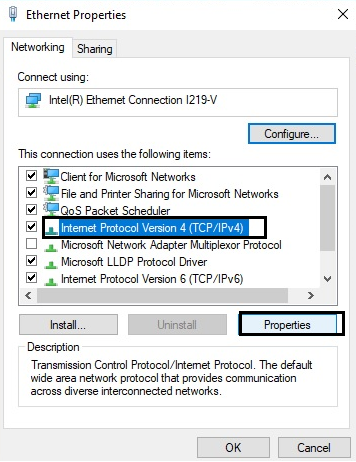
- Highlight “Internet Protocol Version 4 (TCP/IPv4)”, and click “Properties”.
- Under “General” tab, select “Use the following DNS server addresses:”. Enter the IP of DNS to “Preferred DNS server: “and “Alternate DNS server:”. If you have done the configuration, click “OK” to confirm.
- Done.
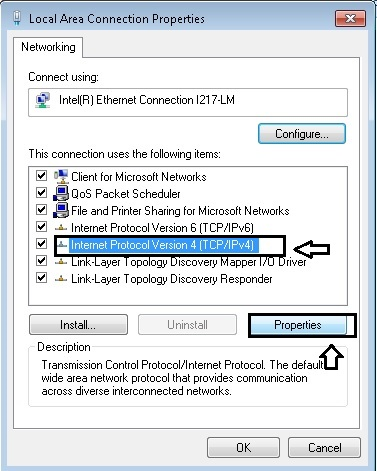
Window 7
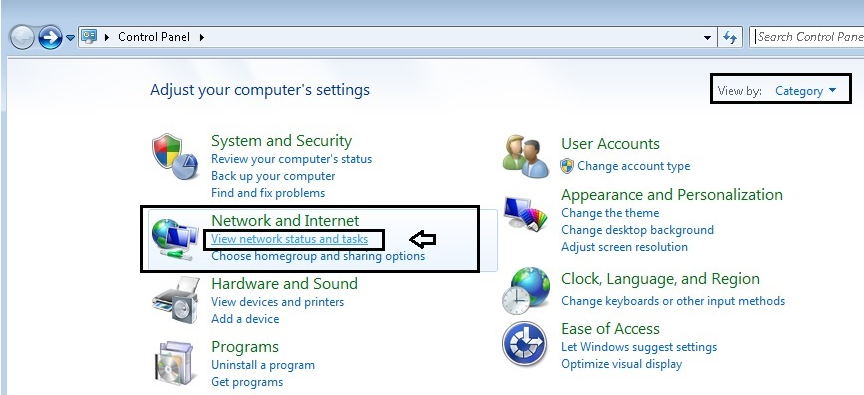
- From the “start menu”, click “Control Panel”, and then click “View network status and tasks” under “Network and Internet”. (Tips : Make sure “View by: Category”)
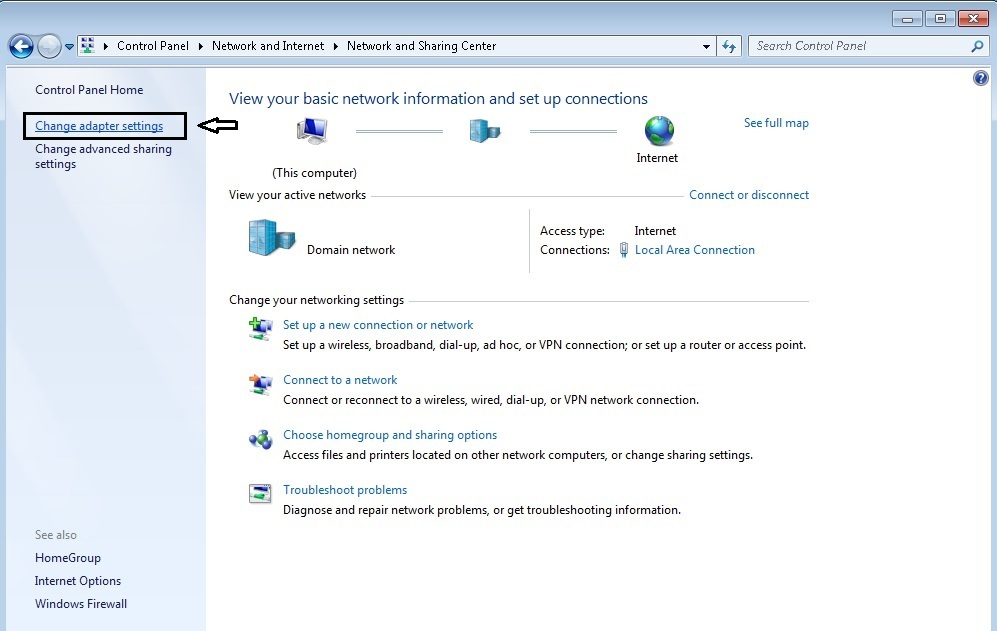
- Click “Change adapter settings”
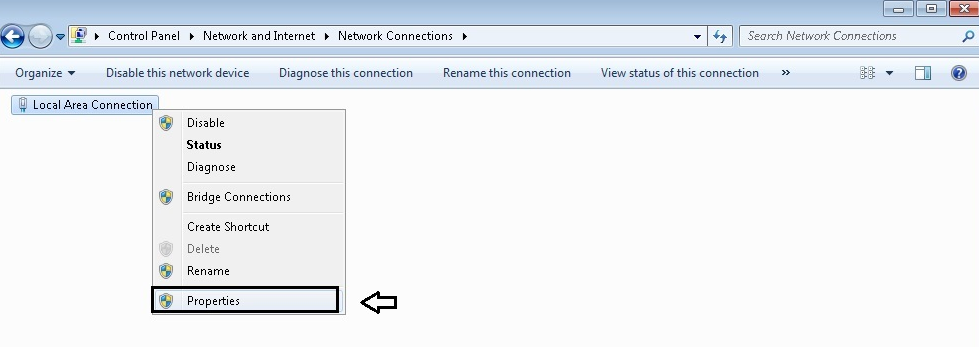
- Assume that you are using wired network, Right click the “Local Area Connection” and select “Properties”
- Highlight “Internet Protocol Version 4 (TCP/IPv4)”, and click “Properties”.
- 5. Under “General” tab, select “Use the following DNS server addresses:”. Enter the IP of DNS to “Preferred DNS server: “and “Alternate DNS server:”. If you have done the configuration, click “OK” to confirm.
- Done.
| Common secure DNS services | |||
| Provider | Primary IP | Secondary IP | website |
| Cloudflare | 1.1.1.1 | 1.0.0.1 | https://www.cloudflare.com/learning/dns/what-is-1.1.1.1/ |
| Comodo | 8.26.56.26 | 8.20.247.20 | https://www.comodo.com/secure-dns/ |
| 8.8.8.8 | 8.8.4.4 | https://developers.google.com/speed/public-dns/faq | |
| Quan9 | 9.9.9.9 | 149.112.112.112 | https://www.quad9.net/faq/ |
| OpenDNS (Cisco) | 208.67.222.222 | 208.67.220.220 | https://www.opendns.com/setupguide/ |
Share with